Meshtastic isn't just for hikers: a shed alarm that rides the mesh
Meshtastic isn't just for hikers: a shed alarm that rides the mesh
Meshtastic, the off-grid long-range radio messaging protocol, has been having what Hackaday called a renaissance — new users meshing cities, disaster-response groups, search-and-research teams, hikers. But most coverage stops at text messaging between people. A build by GreatScott! shows the other, quieter use: Meshtastic as a generic telemetry layer for machines.
The build
The problem was mundane: a garden shed too far from the house for WiFi, and a desire to know if anyone opened it. Broadband over LoRa is impossible — the protocol runs at kilobits, not megabits. But an alarm doesn't need bandwidth. It needs a few bytes, occasionally, reliably.
The solution, demonstrated in the project video:
- Detection. An LED emitter-detector pair mounted in two bars forms an infrared beam across the shed door. Breaking the beam trips the sensor.
- Node one (the shed). A Heltec ESP32 LoRa module reads the 12 V beam-break signal and publishes it onto the Meshtastic mesh as a message.
- Node two (the house). A second Meshtastic node sits within WiFi range of the home network and bridges mesh traffic to a Home Assistant server, which handles notifications and any follow-up automation.
The elegance is that neither node needs custom firmware. Meshtastic's supported-message publishing and its Home Assistant integration do the heavy lifting; the whole thing behaves like any other HA sensor entity once configured.
The sensor side, practically
Beam-break is the right detector for a door, and it's worth understanding why before substituting something clever. A reed switch tells you the door is shut; a beam break tells you something moved through it, even a person walking in behind an open door. The emitter and detector run on the shed's 12 V supply, the detector output is a clean open-collector signal, and the node reads it on a GPIO with the pull-up enabled — the optocoupler between the two domains is the whole wiring job. A PIR would be simpler still, but in a small shed it false-triggers on spiders, draughts and sun-warmed metal, and every false alarm trains you to ignore the real one. Detection at the door is where the signal-to-noise is.
The Home Assistant half, in a bit more detail
The bridge node has two ways to get mesh traffic into Home Assistant, and they're worth telling apart before you build. The first is the native integration, where the HA server connects to Meshtastic's MQTT topic tree: the bridge node forwards packets over the MQTT transport Meshtastic already supports, and Home Assistant discovers the entities automatically. The second, and the one GreatScott uses, is the dedicated Home Assistant connection documented on the Meshtastic getting-started pages, which presents nodes as HA devices without an MQTT broker in the middle.
Either way, the shed node ends up as a binary sensor in HA, and from there it's ordinary automation work: notify-mobile-app on state change, log to a history graph, arm/disarm by time of day. A decade ago this exact job meant either a commercial IoT subscription with its monthly fee and its cloud dependency, or a weekend of custom RF firmware. Now it's configuration. I'd still wire the sensor to the node through an optocoupler rather than directly — the shed side is 12 V and the ESP is not, and the one build failure mode you don't want is the alarm killing its own radio.
Why this pattern matters
Every off-grid sensor you've ever wanted — gate open, tank level, dam height, door contact, temperature in the cool room — can ride the same structure. The shed alarm is just the clearest demonstration: a dumb sensor, a LoRa node, and a bridge node near your house. Meshtastic is doing for hobbyist telemetry what a decade ago required either a commercial IoT subscription or a custom RF design.
For Australian builders, the parts are all standard: the mesh nodes are ESP32-plus-LoRa boards, and our StealthMesh Field Kit (A$159) bundles a T-Beam node with solar support for exactly this kind of outbuilding duty, while the StealthMesh Duo (A$100) gives you the two-node pair you need for a bridge setup. We also stock the MQTT-connected hub build if your automation brain lives on a server rather than Home Assistant.
Powering the shed node
The mains-free case is where this pattern either works or doesn't. A Heltec-class node wakes, reads the sensor, transmits and sleeps at a duty cycle measured in microamps, which means a small solar panel and a 18650 cell keep it alive indefinitely — this is the same duty cycle Meshtastic's own hardware guidance assumes for solar field nodes. Two habits keep it that way. First, set the broadcast interval conservatively: a shed alarm that shouts "all quiet" every thirty seconds flattens a battery in a week; one that transmits on event and hourly heartbeat lasts a season. Second, plan for winter — a panel angled for summer sun will under-deliver in June, and the failure shows up as a dead node on the one week you actually needed the alarm. Oversize the panel rather than the battery; batteries add failure modes, panels just add capacity.
Australia-specific notes
Two practical things to get right here:
- Frequency. Australian Meshtastic nodes use the
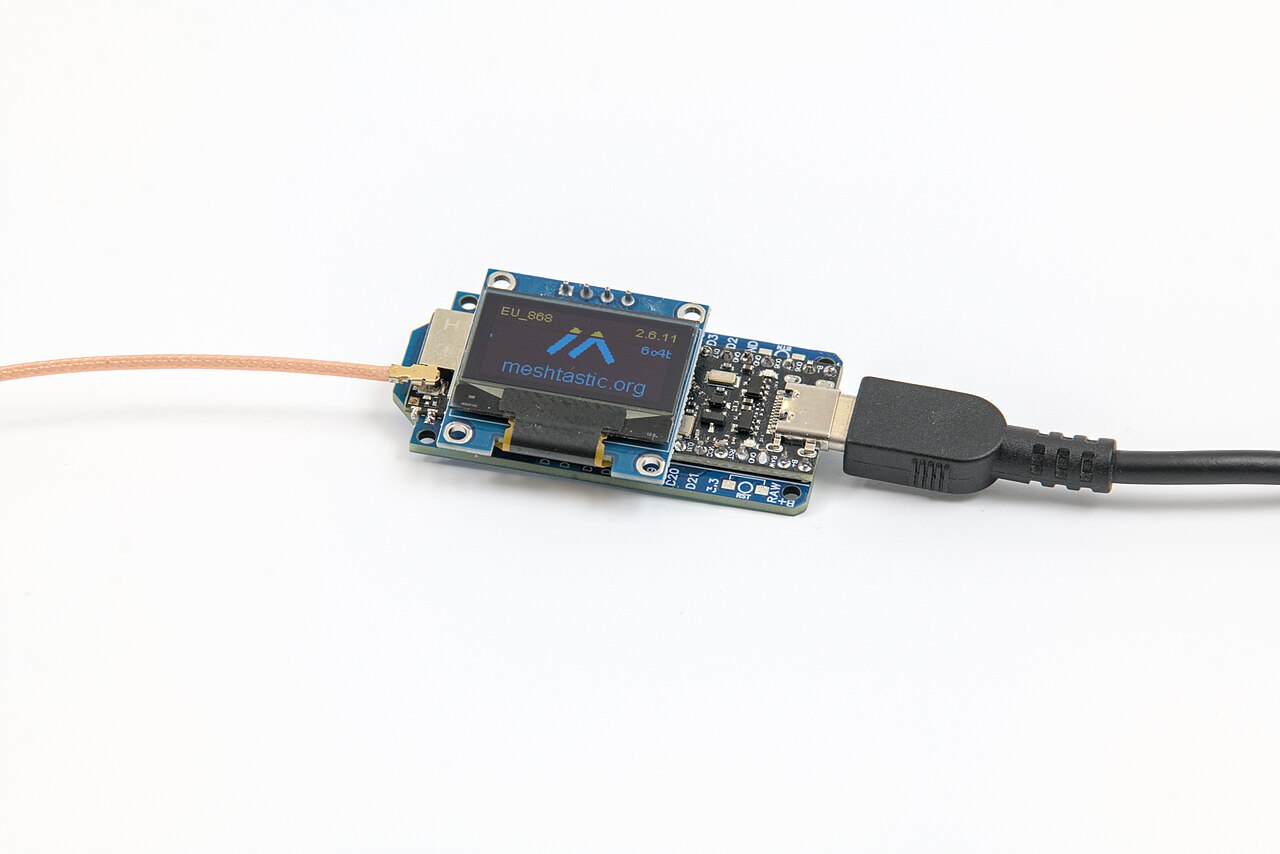
ANZregion setting (Australia & New Zealand, 915.0–928.0 MHz per the current region table). This is set once in the app when you configure your first node — our Meshtastic first-node checklist walks through it. Operating LoRa gear in this band is licence-free; an incorrect region setting can push you outside legal parameters, so don't skip it. Devices shipped from overseas frequently default to EU_868 — the node in the photos on this page is doing exactly that — and a default-region node isn't just illegal to transmit on here, it also won't hear your other Australian nodes at all. - Encryption and trust. Meshtastic messages are encrypted by default, but mesh channels are only as private as their key handling — our post on what Meshtastic encryption protects covers the honest limits. For a shed alarm this matters little; for anything more sensitive, think it through first.
Difficulty and limits
Easy to intermediate. The sensor wiring is a simple beam-break circuit; the software is configuration, not coding. The honest limits are LoRa's: expect hundreds of metres to a few kilometres depending on terrain and antenna, notWiFi distances. Line-of-sight matters more than transmitter power. If your shed is genuinely out of mesh range, a repeater node on a fence post solves more problems than a bigger antenna does.
One further limit that surprises people: detection latency under a meshed network. If the packet has to hop through a third node to reach your bridge, each hop adds seconds, and congested public meshes in capital cities can add more. For a shed alarm that's tolerable — nobody can be inside your shed for less than a minute without being noticed anyway. For anything that needs sub-second response, Meshtastic is the wrong tool, and being honest about that is better than overselling it.
If you want the broader picture of mesh options in Australia, our LoRa mesh versus encrypted messengers comparison covers where Meshtastic sits in the landscape.
Affiliate disclosure: products linked above are sold in our own store.
Sources: Hackaday — "Meshtastic Does More Than Simple Communication" · GreatScott! project video · Meshtastic LoRa region documentation · Meshtastic MQTT integration · Meshtastic getting-started documentation. Links verified live 2026-10-07.