"SDR antenna and filter upgrades: what actually improves reception"
SDR antenna and filter upgrades: what actually improves reception
Every software-defined radio hobbyist reaches the same plateau: the software is configured, the signals are there, but they are weak, noisy or drowned in interference. The instinct is to buy a better receiver. The evidence points somewhere else entirely — at the antenna, its placement, and the filters in the chain ahead of your receiver. This guide walks through the upgrade ladder in the order that actually moves numbers, with the reasoning and the sources for each rung. If you are choosing the receiver itself, see our RTL-SDR vs HackRF vs Airspy comparison; this article assumes you already own one and want more out of it.
First rule: antenna placement beats everything
Radio signals at the frequencies most SDR users care about — VHF and UHF — are largely line-of-sight. Whatever blocks the path between you and the transmitter costs you signal, and the ceiling of your house is usually the biggest blocker you can eliminate for free. The practical order of operations is fixed: get the antenna high, get it near a window or outdoors, give it a clear view of the horizon, then start spending money. This is not folklore. The community guidance is consistent, and a desk-to-window move routinely transforms results — the RTL-SDR V4L setup guide puts "clear view of the horizon" and "higher antenna placement" ahead of antenna tuning, cable, LNA and filter in its prioritised list for ADS-B stations, and warns directly: "do not assume maximum tuner gain will compensate for a poorly positioned antenna."
Placement is also free in the financial sense but not always in the aesthetic one. An antenna taped to a window facing the nearest transmitter beats an identical antenna in a metal-framed room every time. Before buying anything, spend an afternoon with the stock antenna and a laptop, watching the noise floor and signal strength as you change positions. That afternoon is the most valuable upgrade hour in the hobby.
Second rule: match the antenna to the band
A stock telescopic or whip antenna is a compromise — deliberately, because dongles ship worldwide to users chasing different bands. Once you know what you listen to, a band-matched antenna is the highest-value purchase:
- 1090 MHz (ADS-B aircraft) — a dedicated collinear or outdoor antenna tuned for 1090 MHz is the difference between tracking aircraft within a few kilometres and a station that rivals community feeds. Our ADS-B 1090 MHz outdoor antenna at A$22.96 exists precisely for this job, with SMA/N options to suit a mast run.
- VHF marine, airband, UHF scanning — a decent discone or a band-specific whip mounted up high beats anything telescopic.
- HF (shortwave) — a random wire or end-fed antenna of several metres, ideally outdoors, is the entire game; the receiver is almost irrelevant by comparison.
Matching matters electrically, not just by connector. An antenna cut for the wrong band is inefficient at every frequency — the physics is unforgiving even when the SMA fits.
Third rule: filters before amplifiers
This is where most upgrade paths go wrong. Strong out-of-band signals — usually broadcast FM, sometimes AM broadcast, cellular or paging — overload the receiver's front end and produce ghost signals, intermodulation products and a raised noise floor. The symptom looks like "my reception is bad" and the instinct is to amplify. The correct response is the opposite: reduce what is arriving, then, only if needed, amplify what remains.
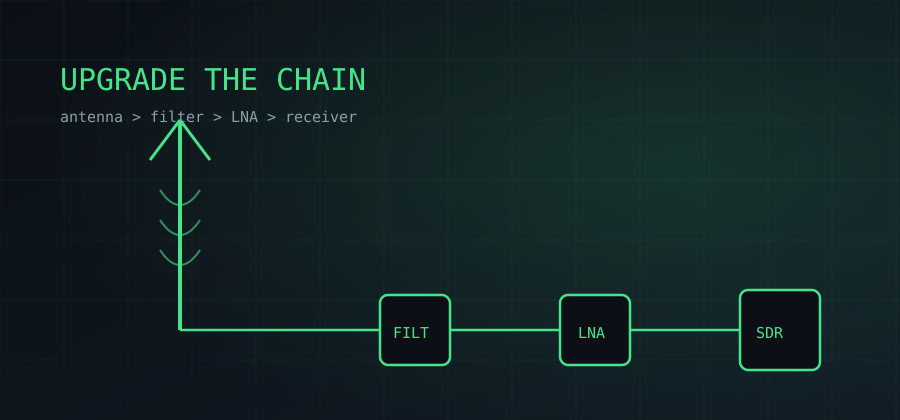
The canonical ordering, documented in the SDR filters guide at gophertrunk.org, is: antenna → filter → LNA → coax → receiver. Their step sequence is worth internalising verbatim: turn gain down first (free diagnostic — if lowering gain cleans up the ghosts, you were overloading); add the right notch filter; add a bandpass filter if you live on a single band; only then consider an LNA, placed after the filter so you never amplify the interference you just removed. A typical broadcast FM notch costs 1–3 dB of insertion loss in the passband but can drop the noise floor by 10 dB or more — an outstanding trade when FM overload is your problem.
Concrete filters worth knowing:
- FM broadcast notch (88–108 MHz) — the single most common fix for city-dwelling VHF/UHF listeners near FM towers.
- AM broadcast notch (below ~1.7 MHz) — for HF listeners swamped by local medium-wave stations.
- 1090 MHz bandpass — for permanent ADS-B stations in strong RF environments. Documented results are real: in RTL-SDR.com's coverage of a 1090 MHz filter with integrated bias tee, the designer's own tests showed roughly a 20 percent improvement in ADS-B decoding, with the community capturing clearly more frames per second with the filter switched in (see the RTL-SDR.com filter coverage). Your mileage varies with your RF environment, which is exactly why you diagnose before buying.
Our LNA and FM/ADS-B filter set at A$19.67 bundles both halves of the fix for ADS-B and general VHF/UHF use, and is the accessory we most often recommend after an antenna upgrade.
Fourth rule: if you amplify, amplify correctly
An LNA (low-noise amplifier) placed at the antenna — not at the receiver — compensates for coax losses on long runs. Two technical details decide success:
Power it over the coax. Most SDR dongles, including the RTL-SDR Blog V4, provide a software-switchable 4.5 V bias tee for exactly this purpose — the V4 datasheet rates it at 4.5 V, 180 mA, switched in software via rtl_biast or the vendor driver's controls. For a Raspberry Pi ADS-B station that should run unattended, the driver's EEPROM setting can force the bias tee on at boot so the LNA powers up with the receiver.
Do not feed DC into a DC short. The RTL-SDR Blog V3 user guide carries the standing warning: never enable the bias tee into an antenna or accessory that presents a DC short unless an LNA or DC isolation sits in between. Some antennas are DC-shorted by design (grounded whips); feeding 4.5 V straight into one is at best a dead input and at worst a damaged dongle. The safe chain is antenna → compatible LNA → coax → dongle with bias on; the unsafe one is DC-short antenna → coax → dongle with bias on.
Gain discipline. More amplification is not more reception. An overloaded receiver decodes fewer messages than a correctly gained one — the sdrstore guide's advice for ADS-B is to optimise gain by comparing actual decoder output (messages per second, aircraft count, maximum range), not by chasing a brighter waterfall.
The complete upgrade ladder, in order
- Move the antenna. Window, then outdoors, then up. Cost: nothing.
- Band-match the antenna. The right antenna for the signals you actually chase. Cost: A$10–30.
- Shorten and improve the coax run. Cheap RG-58 over ten metres eats signal; keep runs short, use quality cable at 1090 MHz especially.
- Add the notch filter your diagnosis points to. Usually FM; sometimes AM; occasionally a bandpass for a single-band station.
- Add an LNA at the antenna if coax losses are real, powered by the bias tee, with the DC-short caveat respected.
- Only now consider a better receiver. And when you do, you will know exactly why — because every cheap dB is already banked.
Where our products fit
For the most common journey — a first ADS-B station or a general VHF/UHF listening post — the shortest path is our RTL-SDR V4 kit (A$36.18, includes the dipole set for experimenting), the ADS-B outdoor antenna when you commit to a permanent station, and the LNA + filter set when your RF environment justifies it. That is under A$80 in accessories for a station that performs like gear costing many times more — because the money went into the parts of the chain that physics rewards.
The summary for the impatient: position first, band-match second, filter third, amplify last, upgrade the receiver only when you can name the signal you are missing. Every hobbyist who skipped a rung has paid for it twice.